Welcome to the DR Trimmer Mower owner’s manual! This guide provides essential information for safe and effective operation‚ helping you maximize your machine’s performance and longevity;
Overview of the DR Trimmer Mower
The DR Trimmer Mower is a versatile and powerful tool designed for efficient cutting of grass‚ weeds‚ and small brush․ Its robust design and adjustable features make it ideal for maintaining large areas‚ trails‚ or hard-to-reach spaces․ With a focus on durability and performance‚ this machine is equipped with high-quality components to ensure reliable operation․ Whether you’re managing overgrown vegetation or tidying up your lawn‚ the DR Trimmer Mower offers a practical solution to save time and effort․
Importance of Reading the Manual
Reading the DR Trimmer Mower owner’s manual is crucial for safe and effective operation․ It provides detailed instructions on proper usage‚ safety precautions‚ and maintenance to ensure optimal performance․ Familiarizing yourself with the manual helps prevent accidents‚ extends the machine’s lifespan‚ and maximizes efficiency․ It also outlines essential guidelines for troubleshooting and routine care‚ ensuring your DR Trimmer Mower operates at its best․ Always refer to the manual before use to guarantee a safe and satisfactory experience;
Safety Precautions
Safety precautions are crucial for protecting both the operator and ensuring effective operation of the DR Trimmer Mower․ Always wear safety gear‚ including goggles‚ gloves‚ and sturdy clothing‚ and remain aware of your surroundings to avoid accidents․ Keep bystanders at a safe distance and follow all guidelines provided in the manual to maintain a secure working environment․
General Safety Rules
General safety rules are essential to ensure safe and effective operation of the DR Trimmer Mower․ Always wear safety gear‚ including goggles‚ gloves‚ and sturdy clothing․ Keep loose clothing tied back and avoid jewelry that could catch on moving parts․ Never operate the machine in wet conditions or on steep slopes․ Maintain a safe distance from bystanders‚ especially children and pets․ Ensure the area is clear of obstacles and debris․ Familiarize yourself with controls and stop the machine immediately if you encounter any issues․
Essential Safety Gear
Essential safety gear is crucial when operating the DR Trimmer Mower․ Always wear protective eyewear‚ such as goggles or safety glasses‚ to shield your eyes from debris․ Sturdy‚ tight-fitting gloves improve grip and protect hands․ Wear long‚ snug-fitting clothing and avoid loose items that could get caught in moving parts․ Steel-toe boots or durable footwear are recommended to prevent foot injuries․ Ensure all gear is secure and properly fitted before starting the machine․ This gear helps protect you from potential hazards during operation․

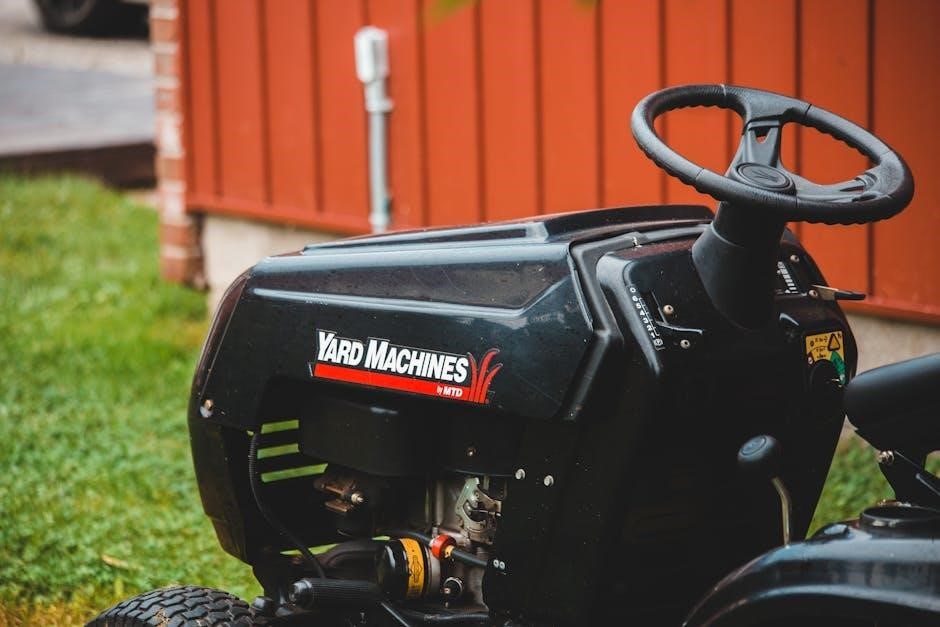
Understanding Your DR Trimmer Mower
The DR Trimmer Mower is designed for efficient cutting of thick vegetation‚ tall grass‚ and weeds․ It handles tough tasks with ease and precision‚ saving time․ Additionally‚ it can recut downed material to create mulch‚ adding value to your yard maintenance routine․
Machine Design and Components
The DR Trimmer Mower features a robust design with a durable cutting deck and powerful engine․ Key components include the trimmer head‚ cutting blades‚ and adjustable handlebars․ The machine is built to withstand heavy use‚ with a focus on reliability and performance․ Its compact design allows for easy maneuverability in tight spaces‚ while the high-torque engine ensures efficient cutting of thick vegetation․ Regular maintenance of these components is essential for optimal functionality and longevity․
Key Features and Capabilities
The DR Trimmer Mower is equipped with a powerful engine and a versatile cutting system‚ designed to handle various tasks efficiently․ It excels at trimming‚ mowing‚ and mulching‚ making it ideal for maintaining large areas or tough terrain․ The machine’s adjustable handlebars and ergonomic design enhance user comfort during extended use․ Additionally‚ it supports interchangeable attachments‚ allowing for customized functionality to meet different landscaping needs․ These features make it a reliable tool for both homeowners and professionals․
Assembly and Setup
Proper assembly and setup of your DR Trimmer Mower are crucial for safe and effective operation․ Follow the step-by-step guide to ensure all components are correctly installed․
Unpacking and Initial Inspection
Carefully unpack your DR Trimmer Mower and inspect all components for damage or missing parts․ Ensure the machine is complete and undamaged before proceeding with assembly․ Familiarize yourself with each part and its purpose to streamline the setup process․ If any components are damaged or missing‚ contact customer support immediately to resolve the issue․ Proper inspection ensures safe and effective operation․
Step-by-Step Assembly Instructions
Follow the manual carefully to ensure proper assembly of your DR Trimmer Mower․ Begin by unpacking all components and organizing them․ Attach the handlebars securely‚ ensuring all bolts are tightened․ Next‚ install the mowing head according to the instructions‚ making sure it is properly aligned and fastened․ Finally‚ connect any additional accessories and double-check for loose parts․ For new users‚ consider referring to the provided diagrams or online guides for clarity․ Proper assembly is crucial for safe and efficient operation․
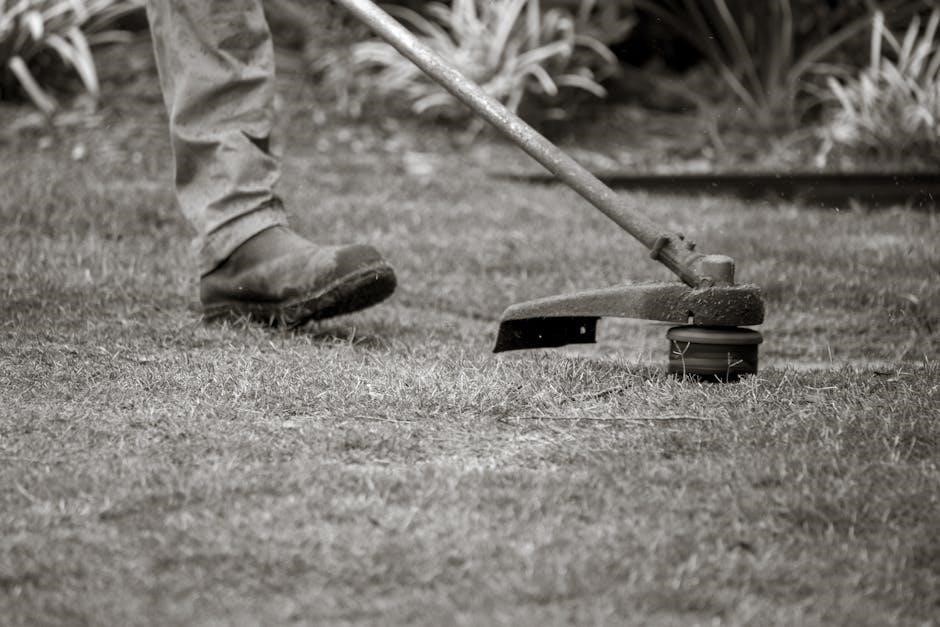
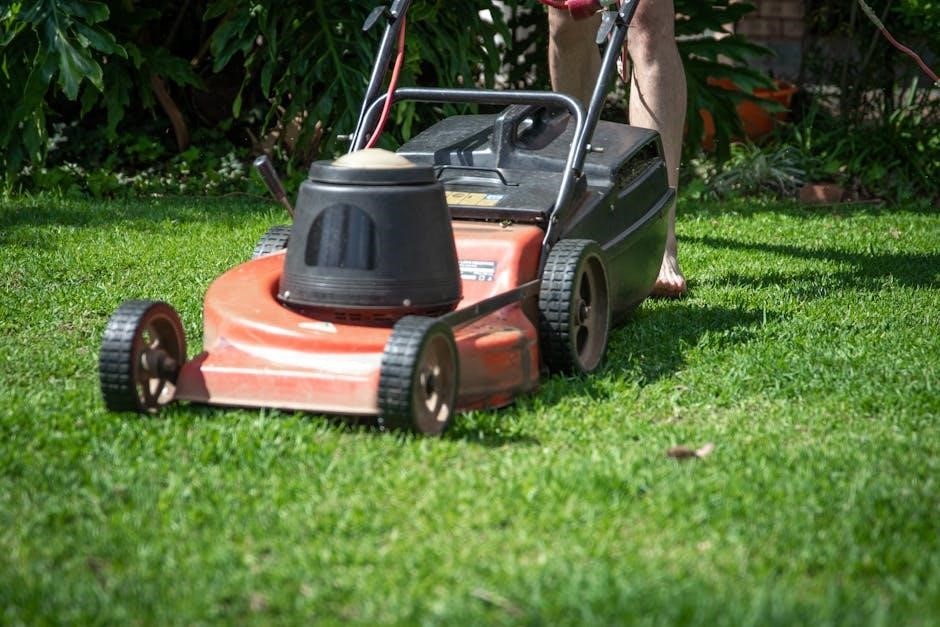
Operating the Trimmer Mower
Mastering your DR Trimmer Mower ensures efficient cutting and maintenance of your lawn․ Always follow pre-operation checks and maintain a steady‚ controlled pace while mowing․
Before starting your DR Trimmer Mower‚ ensure all safety gear is worn․ Inspect the machine for damage‚ check blade sharpness‚ and clear debris․ Verify fuel levels and ensure the throttle and controls function properly․ Always refer to the engine manufacturer’s manual for specific guidelines․ Conducting these checks ensures a smooth‚ safe‚ and efficient operation․ Never skip this step to prevent accidents and maintain optimal performance․ Regular inspections help extend the machine’s lifespan․ To achieve optimal results‚ maintain a steady pace while mowing‚ working in consistent swaths․ Always cut in the direction of the blade rotation for cleaner cuts․ Wear protective gear‚ including goggles and gloves‚ and stay alert for obstacles․ For tough terrain‚ reduce speed and use the trimmer’s deflector․ Regularly check and sharpen the blade for efficiency․ Avoid overloading the machine and follow recommended mowing heights․ Keep the area clear of bystanders and pets for safe operation․ Proper techniques ensure effective cutting and machine longevity․ Regularly inspect and clean the DR Trimmer Mower to ensure smooth operation․ Follow the maintenance schedule and address issues promptly to prevent equipment damage and downtime․ A regular maintenance schedule is crucial for the longevity and efficiency of your DR Trimmer Mower․ Start by cleaning the air intake and cooling system as specified in the engine manufacturer’s manual․ Check and replace the air filter monthly or as needed․ Lubricate moving parts‚ such as the throttle linkage‚ to ensure smooth operation․ Sharpen or replace the cutting blade seasonally to maintain cutting performance․ Additionally‚ inspect the mower deck for debris buildup and clear it regularly․ Always refer to the owner’s manual for specific maintenance intervals and procedures to keep your machine running trouble-free․ Common issues with the DR Trimmer Mower include decreased cutting performance‚ engine troubles‚ and jammed components․ If the blade isn’t cutting effectively‚ inspect for dullness or damage and sharpen or replace it as needed․ For engine issues‚ ensure the air filter is clean and the fuel is fresh․ If the machine overheats‚ check for blockages in the cooling system and clean them promptly․ Regularly lubricate moving parts to prevent jams and maintain smooth operation․ Always consult the manual for specific troubleshooting steps to resolve problems efficiently․ Proper storage and winterization ensure your DR Trimmer Mower remains in optimal condition․ Clean the machine thoroughly‚ protecting it from moisture and debris․ Store in a dry‚ ventilated area․ To maintain your DR Trimmer Mower’s performance‚ store it in a clean‚ dry‚ and well-ventilated area․ Ensure the machine is free from debris and moisture․ Avoid storing in humid or damp environments‚ as this can lead to rust or mechanical issues․ Use a breathable cover to protect it from dust․ For winter storage‚ drain the fuel tank or add a fuel stabilizer to prevent degradation․ Regularly inspect the storage area to ensure no pests or damage occur․ Proper storage ensures your trimmer mower remains ready for use year-round․ Proper winter care ensures your DR Trimmer Mower remains in optimal condition․ Drain the fuel tank or add a fuel stabilizer to prevent degradation․ Clean the machine thoroughly‚ removing dirt and debris․ Apply a rust-inhibiting oil to metal parts‚ especially the cutting blade․ Store the trimmer mower in a dry‚ protected area to shield it from harsh weather․ Regularly inspect for any damage or wear during storage․ These steps help maintain performance and extend the lifespan of your equipment․ Enhance your DR Trimmer Mower’s versatility with genuine accessories․ Explore additional cutting blades‚ mulching kits‚ and handles to customize your machine for diverse tasks and terrains․ The DR Trimmer Mower offers a range of accessories to enhance its functionality․ These include additional cutting blades‚ mulching kits‚ and adjustable handles for improved ergonomics․ Attachments like the brush mowing kit allow tackling thicker vegetation‚ while optional wheels and cart attachments enable easier maneuverability and material collection; Accessories can be purchased directly from DR Power Equipment or authorized dealers to ensure compatibility and quality․ Explore the full range to customize your machine for specific tasks and terrains․ Installing attachments on your DR Trimmer Mower is straightforward when following the manufacturer’s instructions․ Ensure the machine is turned off and cool before starting․ Attachments like mulching kits or brush mowing blades can be secured using the provided hardware․ Always refer to the specific attachment’s guide for detailed steps․ Once installed‚ test the attachment on a small area to ensure proper function․ Regularly inspect attachments for wear and tighten any loose connections to maintain optimal performance and safety during use․Pre-Operation Checks
Operating Techniques and Best Practices
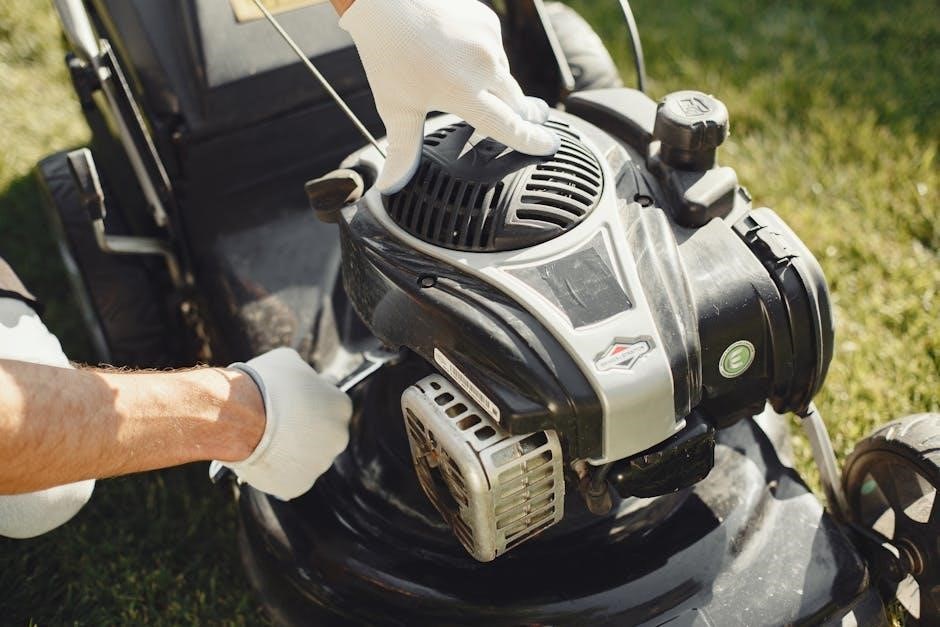
Maintenance and Troubleshooting
Regular Maintenance Schedule
Common Issues and Solutions
Storage and Winterization
Proper Storage Conditions
Winter Care and Preparation
Accessories and Attachments
Available Accessories
Installing and Using Attachments
By following this manual‚ you’ll unlock your DR Trimmer Mower’s full potential‚ ensuring safe‚ efficient‚ and effective operation for years to come․
To get the most out of your DR Trimmer Mower‚ always wear safety gear‚ keep the machine well-maintained‚ and follow recommended techniques․ Regularly clear debris from the engine and blades to ensure smooth operation․ Store the mower in a dry‚ protected area during off-seasons to prevent damage․ Refer to the manual for troubleshooting common issues‚ and contact customer support if needed․ Proper care will extend the life of your equipment and enhance performance․ For assistance with your DR Trimmer Mower‚ visit the official DR Power Equipment website to access downloadable manuals‚ FAQs‚ and troubleshooting guides․ Contact their toll-free support line at 1-800-DR-OWNER (376-9637) for personalized help․ Additional resources include product support pages‚ maintenance tips‚ and user forums․ Utilize these tools to ensure optimal performance and resolve any issues promptly․ Regular updates and support materials are available to keep your equipment running smoothly․Final Tips for Optimal Use
Customer Support and Resources